| This article is part of a collection for the walkthrough for Part Two. The previous article is Chapter 4. The next article is Chapter 6. |
After the Princess deals with the Cult and the demon they worship, she finds herself vulnerable and alone in the Isle of Prisoners. During this part of the story, the Princess explores the barracks, prison, and tomb located on this remote island in an effort to find out where the Dhorn have taken the captive Family members. During her investigation, the Princess learns how the Dhorn have utilized the effects that this dark place has on the people that are killed there.
Notes
- During the chapter, the Princess comes into contact with an undead King, his daughter, and his court.
- During this chapter, the Princess reunites with an old acquaintance in the lower levels of the tomb.
Walkthrough[]
|

Isle of Prisoners[]
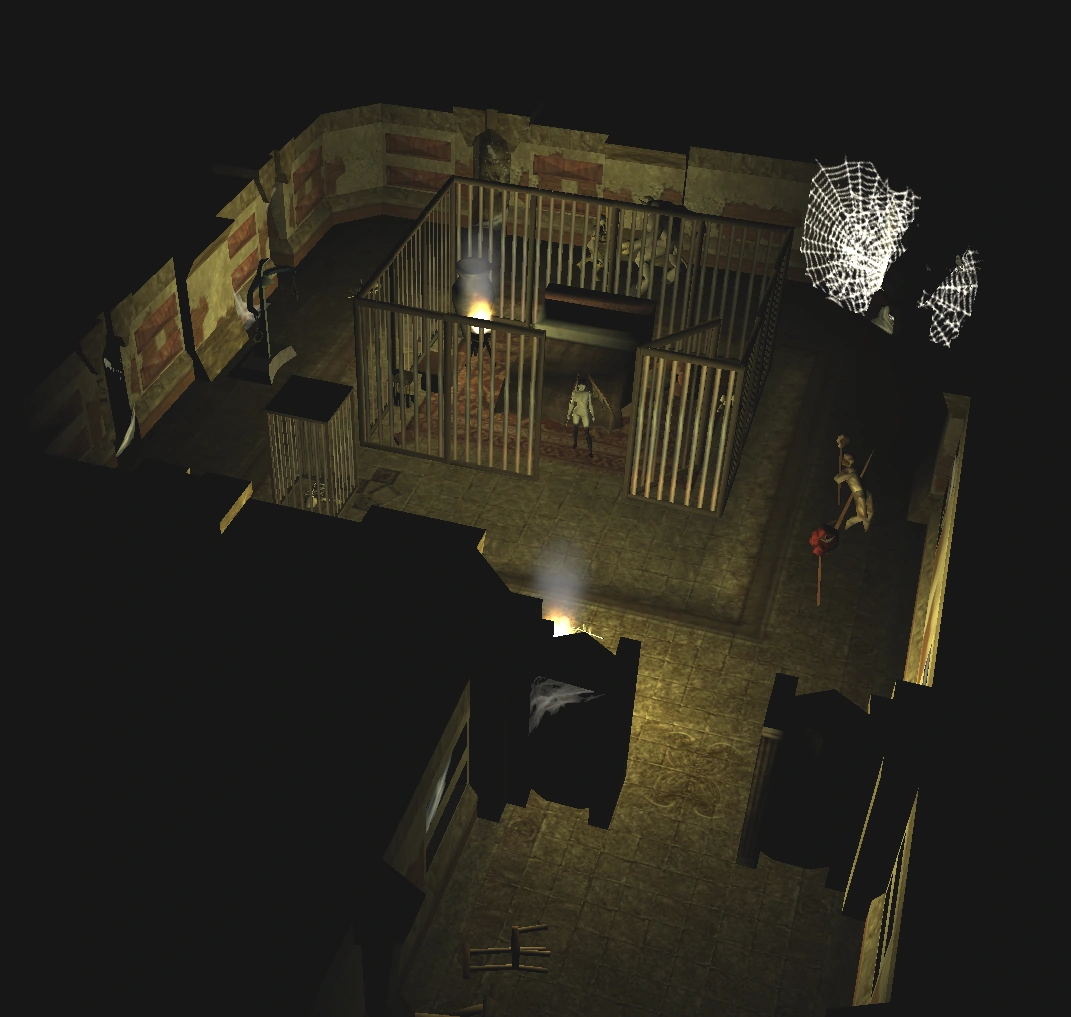
After being sent to the Isle of Prisoners by the demon in the Cult Temple, you'll find yourself naked and your inventory stripped of any armor.
The topmost level of the Isle is outside. There is a fortified Dhorn structure nearby, but there's no way in. Continue north, past the fortification, until you reach the barracks, then head inside. There are a few Zombies and a small room with a diary of events. As you enter the barracks, go to the first storage room on the left and grab the rope stored in a crate. Go downstairs to the prison, where you'll encounter more zombies. Keep an eye out for a hole in the floor. Once you find it, lower yourself down with some rope. If you don't have any rope, you can use the "dm_spawnitem rope" debug mode command.
You'll find yourself on level 1 of the tomb.
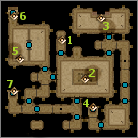
Tomb, level 1[]
The newly rebuilt area of the prison can be found to the west, but you are unable to get to it yet. Walk south, then turn east and sneak past Laurister (#2). There's a hidden door on the east-most wall, near some footsteps. Step through the door and follow the corridor south. Break through the spider webs and head down to level 2 (#4).
The Old King (optional)[]
To the south of Laurister's throne is a room with three statues and a floor lever. You can destroy the statues to walk around the traps on the floor, then pull the lever. It will open the glowing door to the north of Laurister's throne. Step through the door and further north into the Old King's room (#3). As you approach, the door will close behind you. The key to the door and a number of other nice items can be picked from the old king, including the Sword of the Old King, a Belt of Cloud Giant Strength, Boots of Speed, and some jewels.
Tomb, levels 2 and 3[]

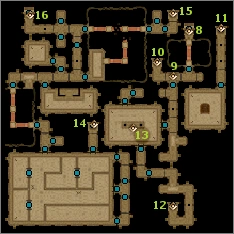
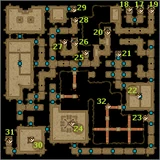
Head south across the bridge and sneak past the wizard, then turn west. When you near the fountain (#9), you'll hear a beautiful voice singing from below. This triggers the A Voice in the Dark quest. You aren't required to investigate, but the information gained will help considerably with your journey through the tomb. There aren't too many friendly faces in the tomb, so it's also a nice distraction. See A Voice in the Dark (below) for more information.
At the fountain (#9), head south through the door. There's a hidden doorway on the east wall of the hallway that takes you to the kitchens, but hold off on that for now. Instead go through the door to the west, where you'll find two sarcophagi (#13). One sarcophagus can be unlocked. Inside you will find the Amulet of the Old Captain, but beware of the vampire who also lies within. To proceed further, unlock the door on the north wall and enter. Inside you'll find two levers. Pulling any of the levers will affect one of three doors; the door to the east, the door to the south or the magic door in the large room to the south, and open or close it depending on whether it is currently closed or opened when you pull the lever.
Once the southern door has been open, snake your way through the hallway until you reach the stairs down (#12).
Take the Ceremonial Tower Shield from the statue in the center of the room (#30). When you have the shield, the door to the north will open and guards will attack. They move slowly, so you should be able to outrun them and make your way back up the stairs to level 2 (#31).
When you're back on level 2, head down the hallway, through the room with the pair of sarcophagi, then into the hidden door on the eastern wall of the hallway (noted earlier). Sneak past the group of Walking Corpse and through the northern door. There is a Doom Knight and a number of traps in the hallway beyond the door, so take your time. Unlock the door and head downstairs to level 3 (#11).
Follow the corridor, first south, then west. Keep an eye open for a hidden door on the southern wall of the hallway, and the warrior mummy wandering the hall. Step through the door and head east down the hallway. Unlock the door toward the north east and use the pull chain behind the pillar. This will unlock a fence further to the south (#22). Unlock the door and enter the room with the glowing fence.
The glowing red door to the south west can be opened with the Highpriest's Key, found in his sarcophagus (#21), in the northern-most room in the north western hallway. The first room on the left has a hidden door on the western wall that leads to a room with a pattern on the floor. This pattern indicates the proper configuration of four levers you're about to reach. Note the pattern (up, down, down up), then return to the main room with the glowing fence. Sneak through the fence to the door on the south eastern wall, unlock it, then enter. You should see four levers before you (#23). Match the configuration with the pattern noted on the floor, by pulling the lever on the left and the lever on the right. You should get 100xp when it's done right. Head back into the main chamber, through the glowing fence, and unlock the red glowing door on the south west wall using the Highpriest's Key. Step through the door and onto the bridge (#32). Follow the bridge south, then east, then south again. There should be a hidden door on the wall before you, leading into the hallway with the blue and orange portals.

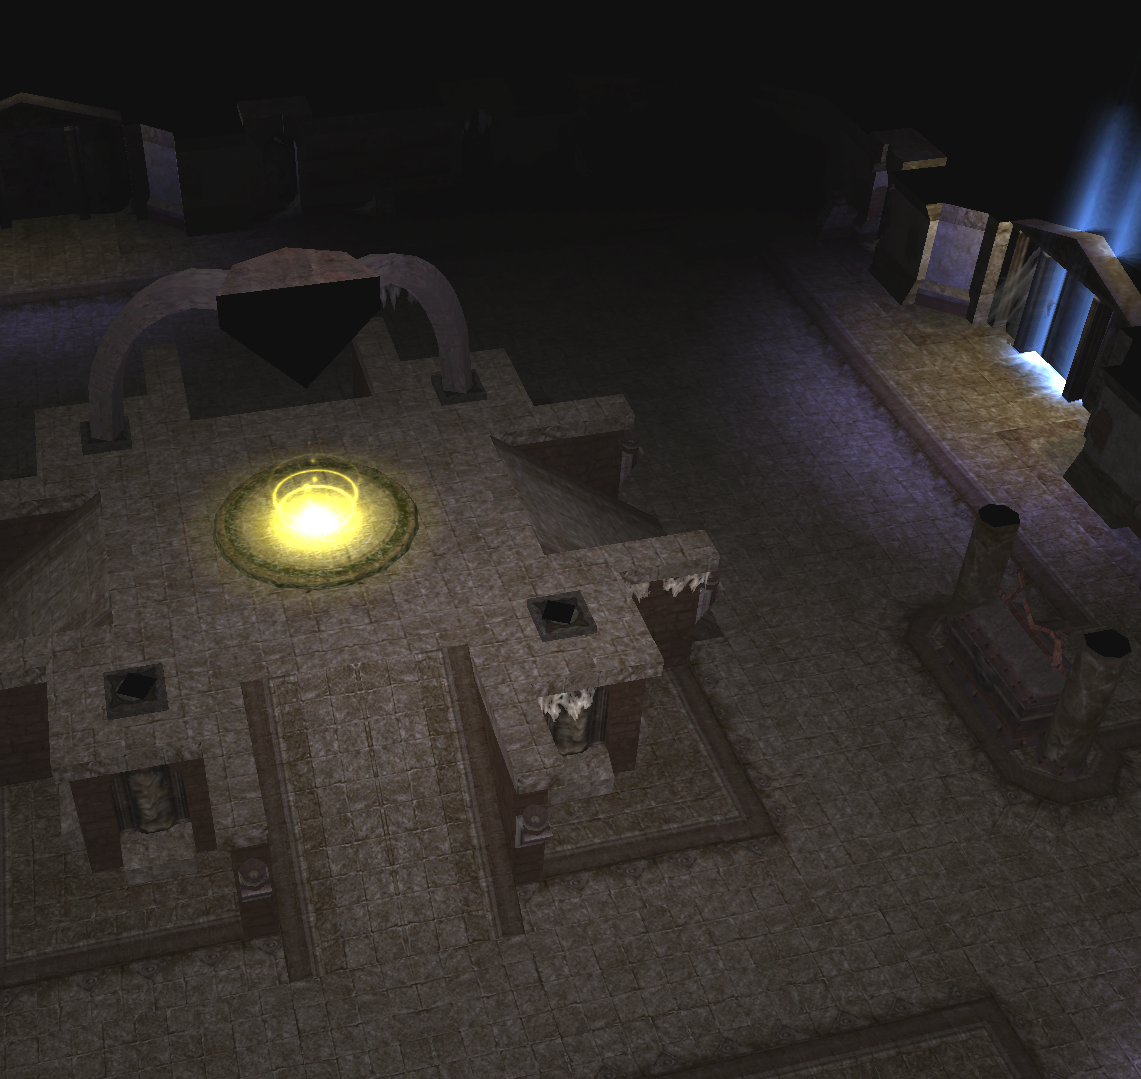
A portal on level 3
Step through the hidden door, into the hallway. You should hear a hissing sound, which indicates that you're on the right track. If you hear laughter, then the lever configuration is likely incorrect. Turn west and enter the blue Shaft of Light. You'll jump to various segments of the hallway as you go, and it will look as if you're going the wrong direction, but just continue through the blue shafts of light until you reach the hallway with the statue. The orange shafts of light will return you to the four levers. Once you've reached the statue, place the Ceremonial Tower Shield inside and the door to your right should open. Step north, through the door, and into the portal in the center of the room (#24).
You should now find yourself on the lower level of the Cult Site. Exit the main room through the door on the western wall and make your way down the hallway. Search Jachan Krows's body and take his key. Jachan also kept a diary of events leading to his capture in Moonville. Once you have his key, head upstairs. If you didn't store your equipment in the upper storage areas, you'll want to head over to where the high priest was and pick up any items that were stripped. Head upstairs to the upper level of the site, pick up any equipment left in storage, then take the stairs in the northeastern corner up to the temple, where you'll find your party waiting. After regrouping, head back into the cult site, down to the lower level with the Wraith Spiders, then step into the portal, which will bring you and your party back to the portal inside the tomb (#24).
A Voice in the Dark (optional)[]
Maren Amraphenneset can be found on level 4 of the tomb. In the early stages of your journey through the tomb, you'll hear singing coming from the lower levels and you can follow it down (#4 -> #10 -> #25) to her room (near stairs at #33). Maren doesn't remember very well what happened to herself and how she ended up like that, yet she knows a great deal about the tomb and it's inhabitants and is willing to answer your questions in exchange for sex. This is optional and you can do well without her info, anyway if you wish to pay her price, leave your henchmen behind and enter alone, she should appear when the princess goes inside the room by herself.
Tomb, levels 3, 4, and 2[]

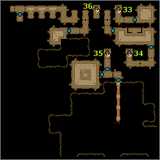
The glowing blue door to the north west can be opened with Jachan's Key. Upon entering the hallway, a Skeletal Guardian will attack. Keep an eye open for a hidden door on the western wall, then step through. The door to the south west leads to King Amraphenneset. It is a difficult path and is not required. See the notes below for more information.
Continue north, through two locked doors, then follow the hallway east and down the stairs (#28), leading to level 4. A cave in will prevent you from moving forward through the hallway, but there are hidden doors on both the east and west sides of the hallway (#36). Head through the western door first, which will put you in a hallway with another hidden door just across the way. Before you step through the hidden door, you might want to explore the Undead Bard's room, which can be easily accessed if you follow the current corridor South and then West. If you defeat the Undead Bard, you can loot from his corpse the short sword Shadowsilk and a Nymph Cloak +5. When you're done, step through the door and make your way down the hallway. Watch out for the many traps on the floor, triggerng one will cause a device at the end of the hallway to fire projectiles. Open the door at the end of the hall and flip the switch on the pillar. Return to the stairs (#36), but do not go up, instead step through the hidden door on the eastern wall. Make your way down the hall and through the door. There are a number of Skeletons as well as a powerful demon called The Butcher. Sneak or fight your way through, then step through the glowing blue door (opened by the lever on the pillar). Follow the hallway around to the stairs (#34), then head up to level 3.

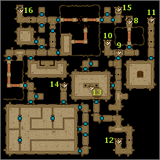
Now follow the hallway around the corner to the stairs (#17) leading to level 2 (#15). In addition to a number of zombies, an undead Dhorn Attendant will be patrolling the walkway. Kill him and take his key, which will unlock the newer areas of the prison found on level 1. Watch out for the Undead Wizard and a skeletal archer, who will attack from a distance. Head back down the stairs (#15) to level 3, around the corner to the stairs (#18) leading to level 4, through The Butcher's room, back to the main hallway with hidden doors on both sides (where you originally started), then take the stairs up (#36) to level 3. Follow the hallway south and take the first left to the east. Use the floor lever to open the door, then step through. Follow the hallway east, then north, to the stairs (#20) leading up to level 2. Make your way past the fountain and take the stairs up (#8) to level 1.
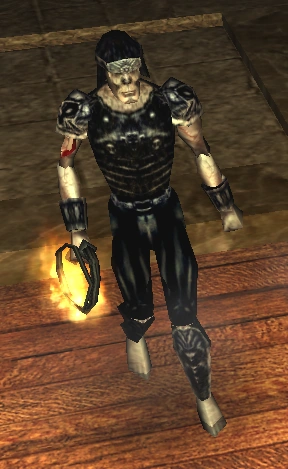
King Amraphenneset (optional)[]

The King
If you enter the room to the south west of the glowing door on level 3 (west of #24, north of #30), Castellan's Shadow will appear and warn you that death is on the other side of the door. A high lock pick and a few good sets of lock pick tools will be needed to open the door and another further in. You will also need at least two henchmen. Once you open the door, you'll find yourself under attack from both sides. Warrior Mummies and Skeletal Archers in front, Doom Knights and Skeletal Guardians from behind. Once you've dealt with all of the undead, you'll need to get two henchmen to stand on the pressure plates on the west wall. When they are in position, tell them to stand their ground. The fenced door will open, allowing you to cross through. As you near the statue, a door will open and The Captain of the Guard will attack. A button on the pillar to the north will open the blue glowing door, allowing you to rejoin with your henchmen. Circle back around and into the north western room. You'll face yet another door with a high lock pick requirement. Once inside, you must defeat the king to get his key.
The King's key opens the room to the east, a room containing four pillars. Each pillar grants a different type of armor with a 5/20 damage reduction. You may want to save before selecting, because you only get one choice. Beyond the armor room is a safe room (#29).
Tomb, Dhorn Prison, levels 5 and 6[]


When you make it to level 1, four Dhorn prison guards should be waiting. Kill them, then make your way through the hallway with the spider webs, back to the main chamber with Laurister. Unlock the new door on the western wall with the Attendant's Key. The northern area can be explored, but there's nothing vital. Some instructions on processing prisoners can be found on the bookshelf. If you take the stairs up (#6) to the docks, watch out for the Dhorn archers. Follow the hallway south west and take the stairs down (#7) to level 2.
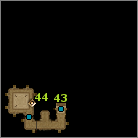
Follow the hallway east. The first door on your right has two guards inside. Sneak or fight your way in and take the Dhorn Prison Key from the pedestal. Use the key to open the fenced gate, then head south and turn west. The door to your north has some prisoners and should trigger a conversation with your party. Return to the main hallway and continue west until you reach the end of the hallway, then go through the door at the south. Follow the bridge to the door at the east and step inside. The door to the east opens a small room with two Dhorn prison guards. The door to the south leads into the main prison area, and a large number of undead prisoners. Make your way through the prison to the door on the far eastern wall, then step into the hallway. Turn north and go through the door on the western wall, which will lead back into the main prison area. Enter the door on the northern wall and head down the stairs (#14) to level 3. Follow the hallway around the corner and take the stairs down (#27) to level 4. Make your way through the hallway to the south east, where you'll find a bridge. Cross the bridge until you come to a pedestal, then use the pedestal to tie a rope and lower your party down to level 5. If you don't have any rope, you can spawn some with the "dm_spawnitem rope" debug mode command.


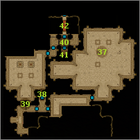
Upon arriving on level 5, a number of Lesser Balrogs will ambush you. When the Balrogs have been defeated, go through the door on the southern wall. Follow the hallway to the west. A safe room can be found through the stairs leading down (#38) to level 6, along with a Shadow who has information on the tomb itself. Continue down the hallway to the west, where a hidden door will appear on the northern wall. Step through the door and into the large room. Unlock the door to the north east and into the hallway with The Bishop (#40).
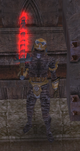
| Tip: In order to advance further you'll have to either sneak past The Bishop or fight him. If you engage in battle, it's useful to observe that he is wielding a weapon with additional fire damage. Thus, if you are equipped with the Amulet of Fire Resistance, the battle will become a mere formality. |
Jacia Colds can be found in the room to the south (#41). She is undead, but can be restored to life by first killing, then resurrecting her with a Rod of Resurrection. Now turn north, through the door, and onto the bridge. When you reach a certain point (#42), the the bridge will collapse and you'll end up on the Planes of Chapter 6.
| This article is part of a collection for the walkthrough for Part Two. The previous article is Chapter 4. The next article is Chapter 6. |